The title of each tool is a link that will take you to that tool's website to learn more or sign up.
Please note that while the descriptions of the tools may be similar, the example links
will take you to new examples of the tool being used as a content module.
Please note that while the descriptions of the tools may be similar, the example links
will take you to new examples of the tool being used as a content module.
Weebly
|
Weebly is a FREE and user-friendly way to make a fantastic looking website... don't you think mine looks great?! I used Weebly. You can include text, images, image galleries, slide shows, videos, links to other pages or outside websites, maps, contact forms, documents, or anything with an embed code. To get started, choose from the many pre-made templates and start click and dragging. Check out how I use Weebly to run my hybrid courses here, or make content accessible to my sixth graders click here.
|
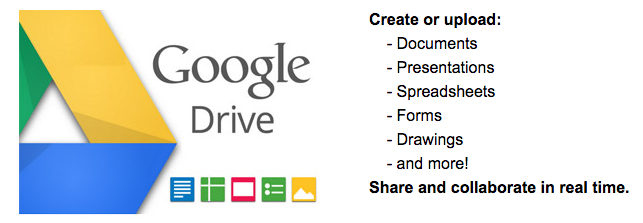
Google Drive
Google Drive is a great alternative to Microsoft Office Suite because (1) it's FREE with a gmail account and (2) you can collaborate and share your work with others. That means that more than one person could be typing in a document AT THE SAME TIME. The document could be kept private, shared with anyone with the link, or shared out to the wide world web. *Note: Be sure you have either "shared" the assignment with your students or selected the "anyone with link" setting so that they can view it.* Also, Google Drive has an app so you can work on your assignments anytime, anywhere, on any device. Click to check out a past presentation to learn more in depth about the Basics of Google Drive.
Google Apps are available across all devices and can be browser-based. There are also apps available for mobile devices.
Google Apps are available across all devices and can be browser-based. There are also apps available for mobile devices.
Google Slides
Google Slides are a great way to give information to students and include multimedia such as images, links, and embedded videos. However, they can be so much more! Google Slides, with a different mindset, can be turned into a learner-centered content module that allows students to click around based on their own choices and learn the content in a non-linear way. Check out the following three examples. First is a non-linear presentation that teaches students about the Engineering Design Process (EDP). Once it gets to the slide about the EDP, students can explore the steps in whichever order they choose. When they've clicked on all six steps, they can move on in the slideshow which checks their understanding with three multiple choice questions. Based on their selection, they will immediately find out if their answer was correct or not. If incorrect, they can try again. If correct, they move on. Another example of a non-linear content module is this example of a Virtual Museum. The teacher can create "rooms" with content and videos for students to explore. This could also double as a student product if the students are the ones who fill in the content for each "exhibit". The last example is of a Choose Your Own Adventure Story. The students start off reading a story about Kevin, but at different points they get to choose what happens next. Based on their choices, there are multiple endings that they will end up at. In all three examples, these content modules were created using Google Slides. It is just a matter of linking objects, pictures, or text to other sides within the same presentation so that it jumps around instead of progressing in a linear fashion. Be sure to include a home page button if there is a spot that students need to return to, to move on to the next part (such as the "lobby" in the virtual museum or the diagram of the Engineering Design Process).
Google Apps are available across all devices and can be browser-based. There are also apps available for mobile devices.
Google Apps are available across all devices and can be browser-based. There are also apps available for mobile devices.
Try it out! CLick around on the slides below
|
|
|
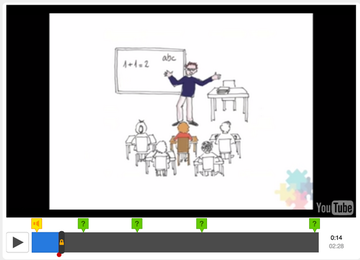
Edpuzzle
|
Do you use videos in your instruction? Why not turn watching videos from a passive task into an interactive one! EdPuzzle allows you to embed questions throughout a video (even YouTube clips!) to track students' understanding. You can crop the video to use only what part you need, add your own voice to insert audio notes or narrate in your own words, and embed the questions along the way to give students immediate feedback. You can find a video from YouTube, Khan Academy, LearnZillion, Crash Course, and more OR upload your own! Click here to view the intro video from EdPuzzle.com. Check out a past presentation to learn about the features more in depth!
Similar alternatives are: EduCanon and TedEd |
|
Powtoons
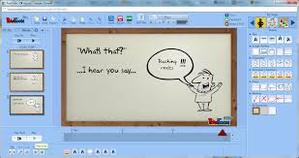
Instead of "death by PowerPoint", make an animated video instead! If you know how to use Microsoft PowerPoint, you can do this too- even my sixth graders loved making them. Powtoons allows you to create slides of information but add animations and props to spice it up. Top it off with some music and/or voice narrations, sit back, and enjoy! Click to the intro video from Powtoons.com.
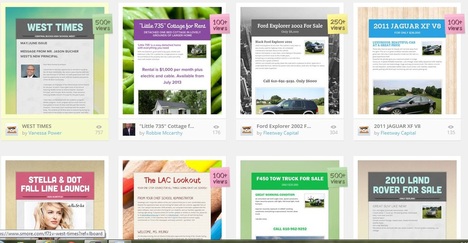
smore
|
Create a virtual flyer to present information about a topic you are teaching, to introduce yourself at the beginning of a course, or as a study guide. You can add pictures, links, videos, audio files, an event (first day of class, open house, deadline or day of test?) and more! As your flyer gets more views, tracking data becomes "unlocked". Click to see an example of a flyer I made available to sixth grade parents about Studying and Homework tips, or this flyer I used to welcome parents at the beginning of the year.
|

|
"Pin" all materials for a lesson on a virtual cork board so students can access them later. You have the ability to type text only or include a link, upload a file, or take a picture with your webcam. You can share your "padlet wall" to social media or export as an image, PDF, Excel, or CSV file. You can also email, print, or embed it. Click to see an example of how I've used padlet as a content module with my sixth grade students.
Padlet is available across all devices and can be browser-based. There is also an app available for mobile devices. |

|
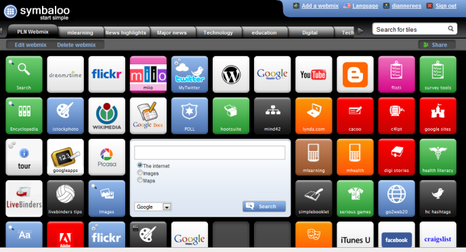
Symbaloo
|
Create tiles to share your favorite websites! Add icons and color-coding to organize and categorize them. You can link or embed the "webmix" on your website or into your Bb course! I tend to make a new webmix for each unit of instruction. You can also have a different type of webmix that houses RSS feeds to popular news and trending info. Click here to see an example of a webmix I share with my grad class to help them with their project.
|
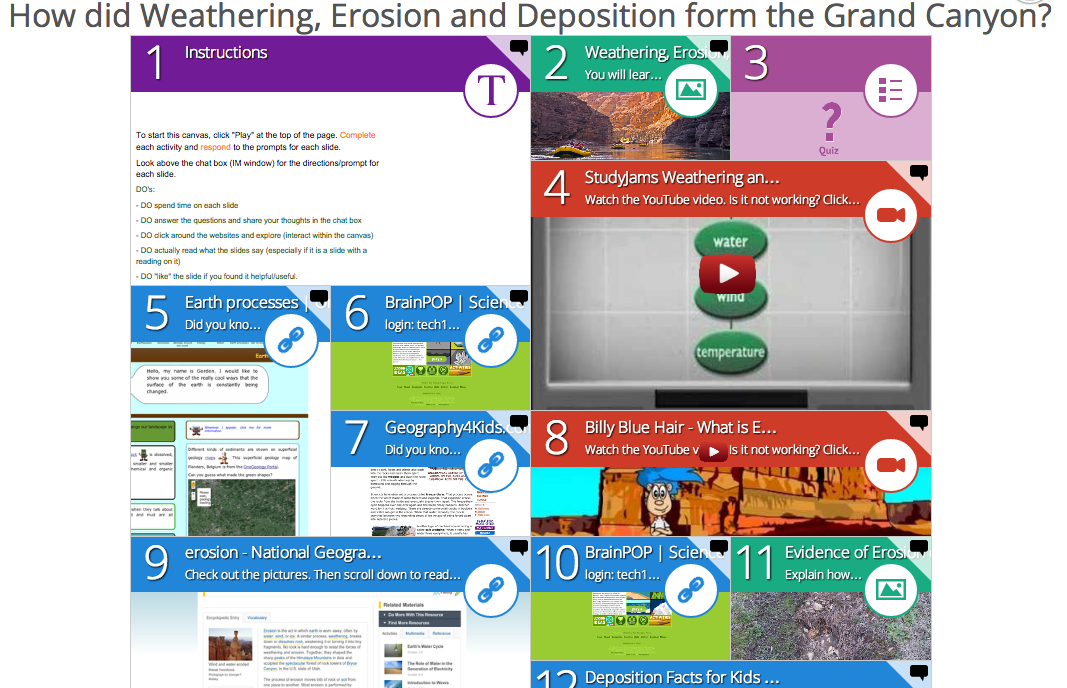
Blendspace (TES)
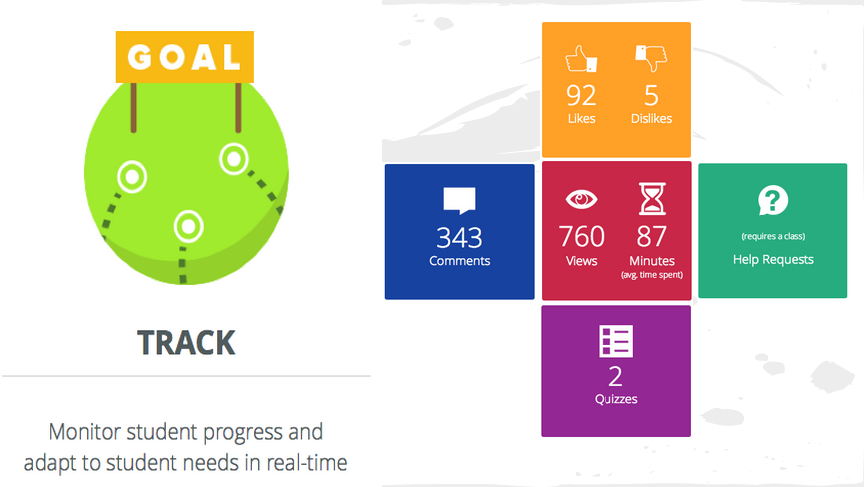
Use Blendspace as a learning module to allow students to explore resources at their own pace, without wandering the net. Put YouTube videos, websites, uploaded files, pictures, etc. into a "canvas". You can check for understanding using the quiz feature and foster collaboration as students share their thoughts in the comment box for each slide. Students can provide feedback by using the like and dislike buttons. Meanwhile, the teacher can monitor all activity from the teacher account including who's saying what and score on the quizzes. Differentiation is made easy by assigning students to certain groups and sharing alike or different canvases with each group. You can also embed your canvas onto your website or in your course! Click here to see an example of a blendspace I use with my sixth graders. Check out a past presentation to learn in depth about the features of blendspace!
|
|
Thinglink

Share multi-media resources with viewers by linking videos, audio (podcast, music, etc.), websites, articles, etc. You can use this to cover a particular concept with your students. The possibilities are endless... as long as it as a link! Click to see an example of how I use this with my sixth graders or another example of how I use this to explain the grade sheet to parents. *NEW* Check out how Thinglink has updated to include 360-degree images and Virtual Reality (VR): See an example
Educreations
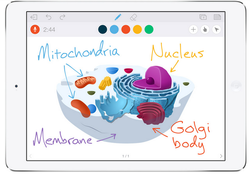
Educreations is a "simple and intuitive" way to make a tutorial video for your students. Unfortunately, Educreations is only available for the iPad for creating videos. Each video has a specific URL that students can watch online (not viewable on mobile phones). Click here for both student and teacher example videos.
Alternative video making apps include: Explain Everything, Show Me, Screen Chomp, and screencast-o-matic
Alternative video making apps include: Explain Everything, Show Me, Screen Chomp, and screencast-o-matic
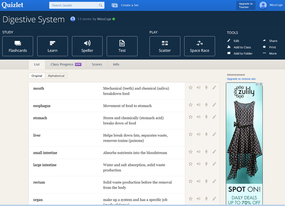
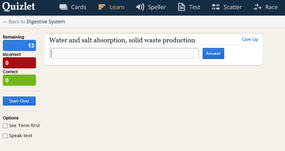
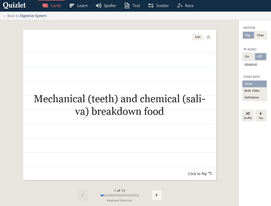
QUIZLET
Quizlet allows the teacher to build "vocabulary lists" by simply typing in the word and it's definition. Students can use the web version or free app to play games that test them on the vocabulary words. Students have full access to set the parameters in which they want to learn (word first, definition first, etc.). Students can quiz themselves with multiple choice/ true & false/ fill in the blank type questions, use virtual flashcards that flip back and forth, or the Scatter or Space Race game among others! Explore the various activities while putting your knowledge of electrical energy to the test by clicking here.
Quizlet is available across all devices and can be browser-based. There is also an app available for mobile devices.
Quizlet is available across all devices and can be browser-based. There is also an app available for mobile devices.
|
|
|
FlipGrid

(FlipGrid, 2019)
FlipGrid is a video discussion platform that allows the educator to pose a prompt or question, and students can reply using videos. After they finish their video response, the app will take a snapshot picture of them to display on the discussion "Grid". Depending on the settings, students can then add stickers on top of their snapshot to show a little personality. FlipGrid is great for assessing knowledge but also with a little creativity, it can be used as a content module. In the "Content Module" mode, videos would be mostly produced by the instructor. It is a great way to help provide video/audio directions for younger students, or students who need a little extra support! Check out how this Kindergarten teacher used FlipGrid to create a fun (gamified) Breakout EDU game!
|
|
When the teacher creates a new "Grid" (the Discussion Board or community), they can choose the Community Type which controls who can join the Grid: School Email, Student ID, or PLCs and Public. You can also password protect the Grid, receive notifications when new videos are added, determine the Active Status of the Grid (Active or Hidden), whether students can download their videos after creating a response, and allow auto-generated captions.
Multiple "Topics" can be added to each Grid. Instructors can adjust the settings per topic to decide the title, display date, and set launch and freeze dates, maximum length of video (ranging between 15 seconds and 5 minutes), the description/ question prompt, the ability to moderate and approve videos before they become visible to others, the topic status (Active, Frozen- can view but not record new, or Hidden- not visible), add resources and attachments, allow selfie decorations/stickers, allow video reactions (students can "like" each others' videos, display # of video views, permit student-to-student replies, and feedback options!
FlipGrid is available across all devices and can be browser-based. There is also an app available for mobile devices.
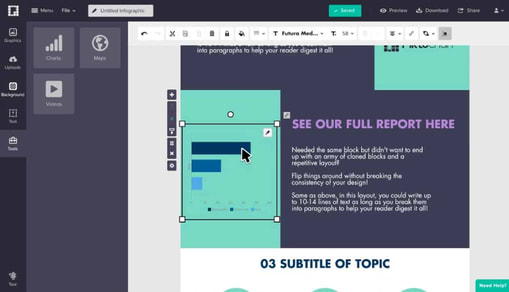
Piktochart
Piktochart is an tool for making infographics, flyers, and presentations. Students can demonstrate their knowledge by essentially creating a poster, in a visually-appealing way! Piktocharts can be shared with a link or downloaded as a image or .pdf file. Other poster making tools include: Canva, Google Drawings, and Adobe Spark.
|
Video link: https://youtu.be/LdRMqJWyvik
|
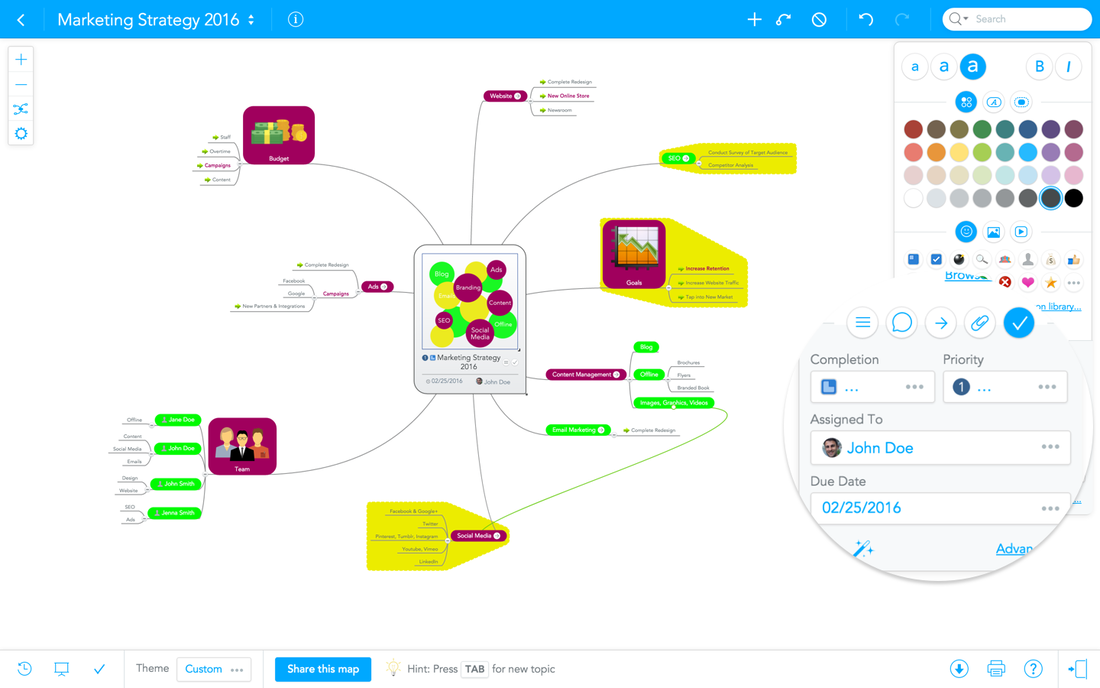
MindMeister
|
MindMeister is an online mind mapping tool that lets you capture, develop and share ideas visually. MindMeister is free and completely web-based, which means there's no download and no updating! MindMeister lets you share your mind maps with as many friends or colleagues as you want and collaborate with them in real-time. Whether you're in a face-to-face meeting or thousands of miles apart, everyone can see changes made in the mind map immediately. Collaborators can quickly comment on topics, vote on ideas or discuss changes in our integrated chat. Similar to a Prezi, MindMeister's built-in presentation mode lets you turn mind maps into beautiful, dynamic slideshows within seconds. As soon as you're done you can export the slides as PNGs, embed the whole presentation on your website, or even broadcast it live to your collaborators online. Mind mapping is a powerful technique that helps you visualize your thoughts and communicate them to others. What’s more, mind mapping encourages a free flow of ideas, which makes it the ideal format for brainstorming and creative problem solving sessions.
All info above was taken from MindMeister. (2019). Online Mind Mapping. Retrieved from https://www.mindmeister.com/ | ||
Remind
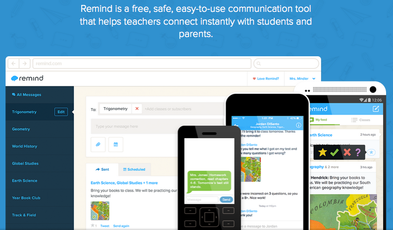
Depending on who signs up for your Remind messages, this service has the capability to simply send reminders via text message, email, or the remind app. If students and parents have the app, they can also "stamp" feedback with a star, check mark, red "x", or question mark. Teachers can also open the account to receive one-on-one chats in response to a message and/or set up "office hours". The best part? The students never get your number and you never see theirs- its is completely private! Another great feature is that you can schedule ahead of time so all your reminders will go out automatically! You can attach files to your message (picture, document, etc.) or include a link. That means you can use Remind to "push out" content to your students throughout class too! You can have multiple groups and include more than one on a message.
Lastly, you can embed the "widget" in your classroom website or LMS to show a running feed of all your remind messages.
Lastly, you can embed the "widget" in your classroom website or LMS to show a running feed of all your remind messages.
Last Updated: April 15, 2019
